How to Build a Multi-Camera Live Streaming Setup
Learn about all the gear, hardware, and software we’re using to go live from home.
If you know me, you know I love to go all-out architecting over-the-top video rigs — some may call it a problem, but I call it a passion. The main reason I’ve constructed my live stream setup as I have for (Out of) Office Hours, our new weekly live broadcast, is so that I can keep our audience engaged, entertained, and interested throughout the entire live stream. With multiple camera angles and different on-screen layouts, I can more easily break free from the normal, boring, one-shot webinars we’ve all come to loathe.
In this post, we’re going to break down all the gear, hardware, and software that goes into my live stream setup here at Wistia. Now, without further ado, here’s a quick rundown of all the gear I’m currently rocking at home:
- Canon 5D Mark IV
- Canon f/1.4 24mm lens
- IndiPRO Tools AC power supply
- Impact articulated arm
- Mini-half apple box
- HDMI to USB converter (AJA U-TAP/Elgato Cam Link)
- Blue Yeti USB mic
- Blackmagic ATEM Mini HDMI switcher
- GoPro Hero
- Canon C200
- Blackmagic Micro
- VHS to DV converter
- Keynote and Zoom auxiliary laptop
- 4’ Quasar LED tube
- OBS streaming software
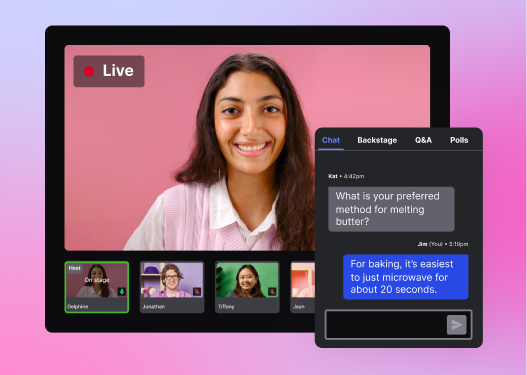
- Crowdcast live streaming platform
If that feels like a lot of gear, it’s sort of because it is. Remember, like I said before I really like to go ham on this kind of stuff, so don’t be intimidated! You don’t need all the gear here to get started with a solid setup, but if you’re curious about how I’m taking the production quality of our weekly live streams up a notch, this post will show you how! Now, let’s get a little more granular on all of the above and dive deep into the world of remote video production, shall we?
Using a Canon 5D as a “webcam”
In order to elevate my shot so it’s a lot nicer than my laptop’s built-in camera, I’m using a Canon 5D Mark IV with a 24mm lens. This lens gives me a nice shallow depth of field and is wide enough to place within arms’ reach. I am powering the camera using an IndiPRO Tools AC Power Supply so I don’t need to keep swapping batteries.
The camera is mounted on top of an Impact Articulated Arm. The arm is using a jaws clamp to attach to a mini-half apple box. The apple box is also surprisingly helpful for wire management — I can hide a bunch of cables inside there so my desk doesn’t look like a bowl of spaghetti.
I’m feeding the image from the Canon 5D into my computer with an HDMI to USB converter. My favorite is the AJA U-TAP, but I also have had good luck with the Elgato CamLink. With an HDMI to USB adapter, you can turn literally any camera with a clean HDMI output into a webcam.
All-in-one Video Platform
Streamline Your Webinar Process
Capturing solid audio with a Blue Yeti USB microphone
For the money and ease of use, you really can’t beat this thing! Just plug it into your computer … and select it as your microphone. No drivers, no fuss! The hardware controls on this microphone really help set it apart from other microphones in the Yeti family, like the Blue Snowball. It has a mute button and a gain dial, which can help you get your levels sounding just right. We recommend this microphone if you’re recording a lot of videos at your desk (which we bet you are)!
Toggling between cameras with the mini video switcher
Now, the secret to switching between different cameras during the live stream is the Blackmagic ATEM mini video switcher. At around $300, this is a pretty nifty tool that’ll let you switch between four different HDMI inputs. You can output the switched feed right into your computer over a USB port. Plug it into your computer, and voila! It shows up just like any other webcam would.
During (Out of) Office Hours, I’m running three cameras into the switcher. Camera 1 is a GoPro giving me a wide shot of me at my desk. Camera 2 is a Canon C200 shooting my dog Lenny. And Camera 3 is a Blackmagic micro camera, which is trying to capture a fox that’s been hanging out in my yard. The fourth input on the switcher I’m using for a second computer to help me present a Keynote slide deck, show videos, and host Zoom calls with special guests on the live stream.
As a quick recap, the ATEM switcher lets me switch between the second computer and all three of the camera angles I mentioned. Pretty sweet, right?
Plus, for even more creative flair and tech absurdity, I’ve also rigged up a VCR to act as another video source. I’m using this late nineties-era Sony DVMC-DA2 that converts RCA to Firewire. When I power this baby up and plug it in, it just shows up as a webcam source on my computer!
Getting the lighting just right with a Quasar 4' LED tube light
The final piece of hardware for this setup is a Quasar 4' LED tube light — and what would a great shot be without some nice lighting?
You might argue this setup is a little bit extreme (are you noticing a trend here?) but it actually works pretty well to get some nice, even fill-light on my face. I have this light in a boom pole holder on top of a basic light stand.
Making the magic happen with Open Broadcaster Software
Last but not least, at the heart of my whole live streaming rig is Open Broadcaster Software or OBS software. With OBS, I can create different scenes that I can easily switch between during the live stream, whatever the case may be. We even used this last year at our Change the Channel event and it worked like a charm! For (Out of) Office Hours, here’s a look at all the different scenes I filter through:
To break it down, we were able to show all of the following thanks to the power of OBS:
- An opening graphic that says I’ll be going live soon
- A countdown graphic along with some Wistia music
- A master full-screen webcam shot
- A switcher feed with some show branding
- A picture-in-picture layout that lets me show my webcam and a feed from the switcher (I tend to use this a lot when I talk over a slide deck)
- A split-screen graphic layout that lets me show my webcam and video feed from the switcher
- A Jurassic Park VHS stream
- A “thanks for watching” video loop with music that I can end the broadcast on
With OBS, I can stream to a bunch of different live video platforms, too. At Wistia, Crowdcast is our webinar and live streaming platform of choice. Once I’m logged into Crowdcast, I just copy the server URL and stream key and paste it into OBS. Then I just hit “start streaming” to go live — it’s pretty easy! But, I do recommend doing a run-through once or twice before you really go live in front of an audience. OBS also allows me to record the show locally on my computer in case I lose my Internet connection, which, let’s face it, is bound to happen at some point.
Now you know what we’re working with!
Well, there you have it. That’s the rundown of my complete live stream rig for (Out of) Office Hours. I won’t lie, all of this adds up to more things that could possibly go wrong when it’s time to go live (which I’ve encountered), but the higher production value definitely shines through for viewers when things go right. If you’ve been getting into some gear that I didn’t feature in this post for your own live stream setup, I’d love to hear what you’re working with in the comments below!
